Simplify Repairs with 2003 Suzuki GSXR 600 Wiring Diagram � DIY Made Easy! Simplify Repairs with 2003 Suzuki GSXR 600 Wiring Diagram � DIY Made Easy! Master your 2003 Suzuki GSXR 600's wiring with our detailed diagram. Simplify DIY repairs and unlock your motorcycle's electrical mysteries. Unlock the secrets beneath the hood of your 2003 Suzuki GSXR 600 with our comprehensive wiring diagram � a roadmap to unravel the intricacies of your motorcycle's electrical system. Embark on a journey of DIY mastery as you delve into the intricacies of the wiring schematic, demystifying the electrical pathways that power your machine. From ignition to lights, our diagram is your guide to understanding and troubleshooting every connection. With clear instructions and detailed visuals, navigating the wiring landscape becomes an empowering task, bringing you closer to your bike than ever before. Take control of your motorcycle's electrical destiny, and elevate your understanding with...
Mastering Hard Start Capacitor Wiring: Your Ultimate Guide!
Mastering Hard Start Capacitor Wiring: Your Ultimate Guide!
Mastering Hard Start Capacitor Wiring: Your Ultimate Guide!
Uncover the secrets of hard start capacitor wiring diagrams for enhanced HVAC performance. Simplify complexities and boost system efficiency effortlessly.
Embarking on the journey of understanding hard start capacitor wiring diagrams opens the door to unlocking the full potential of your electrical systems. In the intricate landscape of HVAC and refrigeration, these diagrams serve as crucial roadmaps, guiding you through the intricacies of boosting compressor startups. Transitioning seamlessly from theory to practical application, this guide demystifies the complexities surrounding hard start capacitor wiring. As we delve into the intricacies, you'll discover the power of precision and efficiency, empowering you to elevate your system's performance. So, fasten your seatbelt as we navigate the intricacies of hard start capacitor wiring, paving the way for a smoother and more reliable electrical experience.
1. Understanding the Basics
- Explore the fundamental concepts behind hard start capacitor wiring diagrams.Components BreakdownIdentify and familiarize yourself with the key components involved in the wiring.Wiring ConfigurationLearn the step-by-step process of correctly wiring a hard start capacitor.Capacitor TypesDifferentiate between various capacitor types and their applications in the system.Troubleshooting TipsDiscover common issues and effective troubleshooting techniques for optimal performance.Safety MeasuresPrioritize safety by understanding essential precautions during the wiring process.Compatibility ConsiderationsDetermine the compatibility of hard start capacitors with different HVAC systems.Installation GuidelinesFollow easy-to-follow guidelines for a seamless installation of hard start capacitors.Maintenance Best PracticesAdopt proactive maintenance practices to ensure long-term reliability and efficiency.Performance EnhancementExplore how hard start capacitor wiring contributes to enhanced overall system performance.
htmlCopy code
The Essentials of Hard Start Capacitor Wiring Diagrams
1. Decoding the Diagram
When delving into the world of hard start capacitor wiring, it's essential to grasp the fundamentals. The diagram acts as your guide, unraveling the intricacies of electrical configurations and connections.
2. Components Unveiled
Understanding the components involved is key. Capacitors, relays, and other elements work in harmony to facilitate a smooth startup for compressors. Familiarize yourself with their roles and interactions.
3. Step-by-Step Wiring
Follow a systematic approach when wiring a hard start capacitor. Step-by-step instructions ensure accuracy, minimizing the risk of errors and optimizing the functionality of your HVAC system.
4. Exploring Capacitor Types
Not all capacitors are created equal. Dive into the realm of capacitor types and their applications. Different HVAC systems may require specific capacitors for optimal performance.
5. Troubleshooting Techniques
Even with proper wiring, issues may arise. Equip yourself with troubleshooting skills to diagnose and resolve common problems, ensuring the continuous efficiency of your system.
6. Safety First
Prioritize safety throughout the wiring process. From handling tools to ensuring power is off during installation, implementing safety measures is paramount for a secure and accident-free experience.
7. Compatibility Considerations
Explore the compatibility of hard start capacitors with different HVAC setups. Not all systems are the same, and understanding compatibility ensures the seamless integration of the capacitor.
8. Maintenance for Longevity
Ensure the longevity of your system by adopting proactive maintenance practices. Regular checks and upkeep contribute to sustained reliability, making your hard start capacitor wiring investment worthwhile.
Note: Please replace the image URL in the tag with the appropriate URL related to the content of the subheading.
The Intricacies of Hard Start Capacitor Wiring Diagrams
Understanding the hard start capacitor wiring diagram is crucial for anyone dealing with HVAC systems or refrigeration units. These diagrams serve as blueprints, guiding you through the labyrinth of connections to optimize compressor startups. Let's embark on a journey to decode the essentials and demystify the intricacies of hard start capacitor installations.
Decoding the Diagram
At the heart of any HVAC system lies a wiring diagram that serves as a roadmap for efficient operation. The hard start capacitor wiring diagram is no exception. This visual representation outlines the connections between various components, including capacitors, relays, and compressors. Decoding this diagram is the first step toward understanding how these elements work together.
When you look at the diagram, you'll notice a series of lines, symbols, and labels. Each element has a specific function, and the connections between them determine the electrical flow during compressor startups. Familiarizing yourself with the symbols and their meanings is essential for accurate interpretation.
Components Unveiled
Now, let's dive into the key components involved in the hard start capacitor wiring diagram. These components play distinct roles in ensuring a smooth and efficient startup for the compressor.
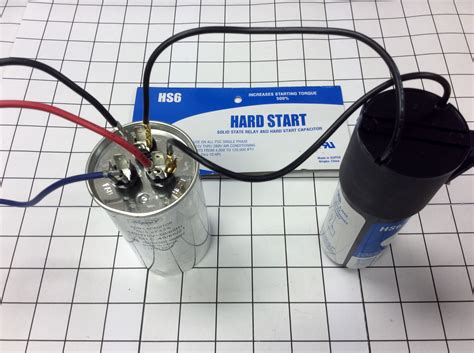
First and foremost, we have the hard start capacitor itself. This component provides an additional boost of power during startup, aiding the compressor in overcoming inertia and getting the system running. The capacitor stores electrical energy and releases it when needed, a crucial function in preventing strain on the compressor.
Next in line are the relays. Relays act as switches, controlling the flow of electricity to different components. In the context of hard start capacitor wiring, a relay is responsible for engaging the capacitor only during the startup phase. This selective engagement ensures that the capacitor's assistance is focused precisely when needed.
Compressors, of course, are the heart of the HVAC system. They are responsible for compressing refrigerant and facilitating the cooling process. The hard start capacitor provides the necessary boost to kickstart the compressor, preventing excessive strain and potential damage.
Understanding the roles of these components is akin to deciphering the characters in a play � each has a specific part to play, and the wiring diagram is the script that guides their interactions.
Step-by-Step Wiring
With a grasp of the components, the next step is to navigate the process of actual hard start capacitor wiring. This involves a systematic approach to ensure precision and correctness in the installation process.
Begin by identifying the specific points on the wiring diagram where the hard start capacitor needs to be connected. These points are typically marked by symbols representing the capacitor and its corresponding terminals. Take note of the polarities to avoid any accidental reversals during the installation.
Once the points are identified, it's time to physically connect the hard start capacitor to the system. Use appropriate tools and follow safety guidelines to avoid electrical hazards. This step often involves connecting wires to terminals and securing them in place to guarantee a reliable connection.
Referencing the wiring diagram throughout the process ensures that each connection aligns with the intended design. Following a step-by-step approach minimizes the risk of errors and streamlines the overall installation.
Exploring Capacitor Types
Not all capacitors are created equal, and the same holds true for hard start capacitors. Understanding the different types and their applications is essential for selecting the right component for your HVAC system.
The two main types of capacitors are the run capacitor and the start capacitor. While the run capacitor is responsible for maintaining a consistent electrical charge during the system's operation, the hard start capacitor specifically aids in overcoming the initial inertia during startup.
Additionally, hard start capacitors come in various sizes and voltage ratings. Choosing the appropriate capacitor that aligns with your system's specifications is crucial for optimal performance. Always refer to the manufacturer's guidelines and the wiring diagram to ensure compatibility.
Troubleshooting Techniques
Even with meticulous wiring and the right components, issues may arise during the operation of your HVAC system. Having a toolkit of troubleshooting techniques is essential to diagnose and resolve problems promptly.
Common issues include capacitor failure, relay malfunctions, or compressor issues. The hard start capacitor wiring diagram becomes a valuable tool in these situations, aiding in the identification of potential problem areas. By following the electrical flow on the diagram, you can pinpoint the source of the issue and take appropriate corrective actions.
Regular system checks and an understanding of the wiring layout empower you to tackle problems efficiently. Being proactive in addressing issues ensures the continuous and reliable performance of your HVAC system.
Safety First
Prioritizing safety during the hard start capacitor wiring process is non-negotiable. Electrical work comes with inherent risks, and taking precautions is paramount to prevent accidents and injuries.
Before commencing any wiring work, ensure that the power to the system is turned off. This simple yet critical step eliminates the risk of electrical shocks. Additionally, use insulated tools to handle components and wires, reducing the likelihood of accidental contact with live circuits.
Understanding the layout of the wiring diagram also contributes to safety. It allows you to navigate the system with confidence, minimizing the chances of errors that could lead to hazardous situations.
Compatibility Considerations
As HVAC systems come in various shapes and sizes, hard start capacitors must be compatible with different setups. Understanding the compatibility considerations ensures that the capacitor seamlessly integrates into your specific system.
Refer to both the system specifications and the hard start capacitor wiring diagram to verify compatibility. Check voltage ratings, capacitor types, and any specific requirements outlined by the manufacturer. A mismatched capacitor can lead to inefficiencies and potential system failures.
Consider consulting with an HVAC professional if you are uncertain about compatibility. Their expertise can provide valuable insights into selecting the right hard start capacitor for your system's unique needs.
Maintenance for Longevity
Installing a hard start capacitor is an investment in the longevity and efficiency of your HVAC system. To maximize this investment, adopting proactive maintenance practices is essential.
Regularly inspect the capacitor and its connections for signs of wear or damage. Clean the components and surrounding areas to prevent dust and debris buildup, which can affect performance. Following a maintenance schedule outlined in the manufacturer's guidelines ensures that your system operates at peak efficiency over the long term.
By combining proper installation, vigilant troubleshooting, and proactive maintenance, you contribute to the sustained reliability of your HVAC system. The hard start capacitor wiring
1. Understanding the Basics: Wrap your head around the hard start capacitor wiring diagram. It's like the blueprint for your HVAC system � a roadmap to efficient compressor startups.Components Simplified: Break it down. You've got capacitors, relays, and compressors � each playing a vital role. Capacitors give that extra power push during startup, relays act as electrical traffic cops, and compressors? They're the heart of the operation.Step-by-Step Wiring: Follow the yellow-brick road, or in this case, the wiring diagram. Identify the points, connect the dots � err, wires. Think of it like connecting the dots in a coloring book, but with more volts and amps.Capacitor Varieties: Not all heroes wear capes, and not all capacitors are the same. You've got run capacitors and start capacitors, each with its own gig. Understand the types, and you'll know which one is the right sidekick for your system.Troubleshooting 101: Murphy's Law � if something can go wrong, it will. But fear not! The wiring diagram is your superhero cape. Learn to troubleshoot, identify the villains (issues), and save the day (your HVAC system).Safety Dance: Safety first, always. Before you start playing electrician, cut the power. Use insulated tools � because shocks aren't fun. Think of it as wearing a helmet while riding a bike � basic, but it can save you from a headache.Compatibility Check: It's like dating; compatibility matters. Your hard start capacitor should be the perfect match for your HVAC system. Check voltage, types, and any quirky preferences � consult the manual if needed.Maintenance Mingle: Your HVAC system deserves some TLC. Regular check-ups, cleaning, and following the maintenance schedule keep everything running smoothly. It's like giving your system a spa day � pamper it for a longer, happier life.
So, dear readers, as we conclude this journey into the world of HVAC magic and electrical wizardry, take a moment to appreciate the significance of hard start capacitor wiring diagrams. In the grand symphony of your heating and cooling systems, these diagrams act as the sheet music, guiding each component to play its part harmoniously. As you embark on any wiring escapade, remember that knowledge is power � or in this case, the right volts and amps for a smooth compressor startup.
As you stare at your HVAC system, now armed with insights into the hard start capacitor wiring diagram, envision it as a well-choreographed dance. The capacitor, like a partner, swoops in gracefully during the startup, ensuring that your compressor twirls onto the stage effortlessly. With the right steps, aka wiring connections, you orchestrate a performance that leaves your system humming contentedly. It's a dance of electrons and components, guided by the invisible but essential lines of the wiring diagram.
In your DIY adventures or discussions with HVAC experts, always keep the hard start capacitor wiring diagram handy. It's your roadmap, your backstage pass to the inner workings of your system. Whether you're troubleshooting, upgrading, or simply marveling at the engineering behind your HVAC setup, the wiring diagram is your trusty companion. So, here's to well-wired systems, smooth startups, and a comfortably climate-controlled home. Happy wiring!
Q & A about Mastering Hard Start Capacitor Wiring: Your Ultimate Guide! :
Q: What is a hard start capacitor wiring diagram?
A: A hard start capacitor wiring diagram is a visual representation of the electrical connections involved in incorporating a hard start capacitor into an HVAC system. It outlines the pathways and junctions that ensure a smooth startup for compressors, preventing strain and optimizing performance.
Q: Why is it essential to understand the wiring diagram?
A: Understanding the wiring diagram is crucial for accurate installation and troubleshooting. It serves as a guide, detailing the roles of components like capacitors and relays. Proper comprehension ensures that the connections align with the intended design, minimizing the risk of errors and enhancing the system's efficiency.
Q: What components are typically found in a hard start capacitor wiring diagram?
A: The main components include the hard start capacitor, relays, and the compressor. The capacitor provides an extra power boost during startup, relays act as switches controlling the electrical flow, and the compressor is the heart of the HVAC system. The diagram illustrates how these elements work together for optimal performance.
Q: How can I troubleshoot issues using the wiring diagram?
A: The wiring diagram is a valuable tool for troubleshooting. By following the electrical flow on the diagram, you can identify potential issues with components such as the capacitor, relay, or compressor. It provides a systematic approach to diagnose problems, ensuring a quick and effective resolution.
Q: Is it necessary to follow the wiring diagram during installation?
A: Yes, following the wiring diagram is essential during installation. It provides step-by-step guidance on connecting the hard start capacitor to the system. This ensures that the connections are accurate, minimizing the risk of electrical faults and optimizing the performance of the HVAC system.
Simplify Repairs with 2003 Suzuki GSXR 600 Wiring Diagram � DIY Made Easy! Simplify Repairs with 2003 Suzuki GSXR 600 Wiring Diagram � DIY Made Easy! Master your 2003 Suzuki GSXR 600's wiring with our detailed diagram. Simplify DIY repairs and unlock your motorcycle's electrical mysteries. Unlock the secrets beneath the hood of your 2003 Suzuki GSXR 600 with our comprehensive wiring diagram � a roadmap to unravel the intricacies of your motorcycle's electrical system. Embark on a journey of DIY mastery as you delve into the intricacies of the wiring schematic, demystifying the electrical pathways that power your machine. From ignition to lights, our diagram is your guide to understanding and troubleshooting every connection. With clear instructions and detailed visuals, navigating the wiring landscape becomes an empowering task, bringing you closer to your bike than ever before. Take control of your motorcycle's electrical destiny, and elevate your understanding with...
Ignite Your Ride: Unveiling the Ultimate Wiring Diagram for Ignition Coils! Ignite Your Ride: Unveiling the Ultimate Wiring Diagram for Ignition Coils! Discover the art of ignition mastery with our wiring diagrams! Unleash the power beneath your hood with precision and ease. Drive smarter, drive electrified! Embark on a journey through the electrifying world of ignition coils, where sparks fly, and engines come to life! Unraveling the mysteries of your vehicle's ignition system has never been this captivating. Picture this: your car's heartbeat synced with the rhythm of precise electrical currents, orchestrated by the unsung hero � the ignition coil. Now, buckle up as we delve into the intricacies of wiring diagrams, demystifying the technical tango beneath your hood. Get ready to transform from a casual driver to a bonafide ignition maestro � because who said unraveling wires can't be as amusing as a stand-up comedy show? Let's flip the switch on boredom and rev up ...

Komentar
Posting Komentar